Table of Contents
Transform your ordinary glass pieces into stunning pieces of artwork by creating stained glass art. It is one of the popular hobbies; although creating stained glass art seems daunting, with the right tools and materials, you can create amazing artwork regardless of your skill level. Stained glass art is a rewarding and intricate craft that has been admired for centuries. Beginning with simple glass pieces and creating stunning stained-glass pieces is a mesmerizing and rewarding experience. In this article, we’ll cover all the essential steps and step-by-step procedures to make stained glass art, whether you are a beginner or a professional artist. However, if your stunning stained glass masterpieces encounter a mishap, there is no need to panic; explore the methods of how to repair stained glass and preserve your creativity.
Materials and Tools
Gathering the materials and tools before starting a stained-glass project is necessary. The following are the essentials required to make stained-glass art.
- Stained glass sheets in various colors
- Glass cutter
- Grozing pliers
- Running pliers
- Copper foil
- Soldering iron and solder
- Flux
- Glass grinder (optional)
- Pattern or design template
- Permanent marker
- Safety glasses and gloves
Steps to Create Stained Glass Art

Step 1
Design Your Pattern
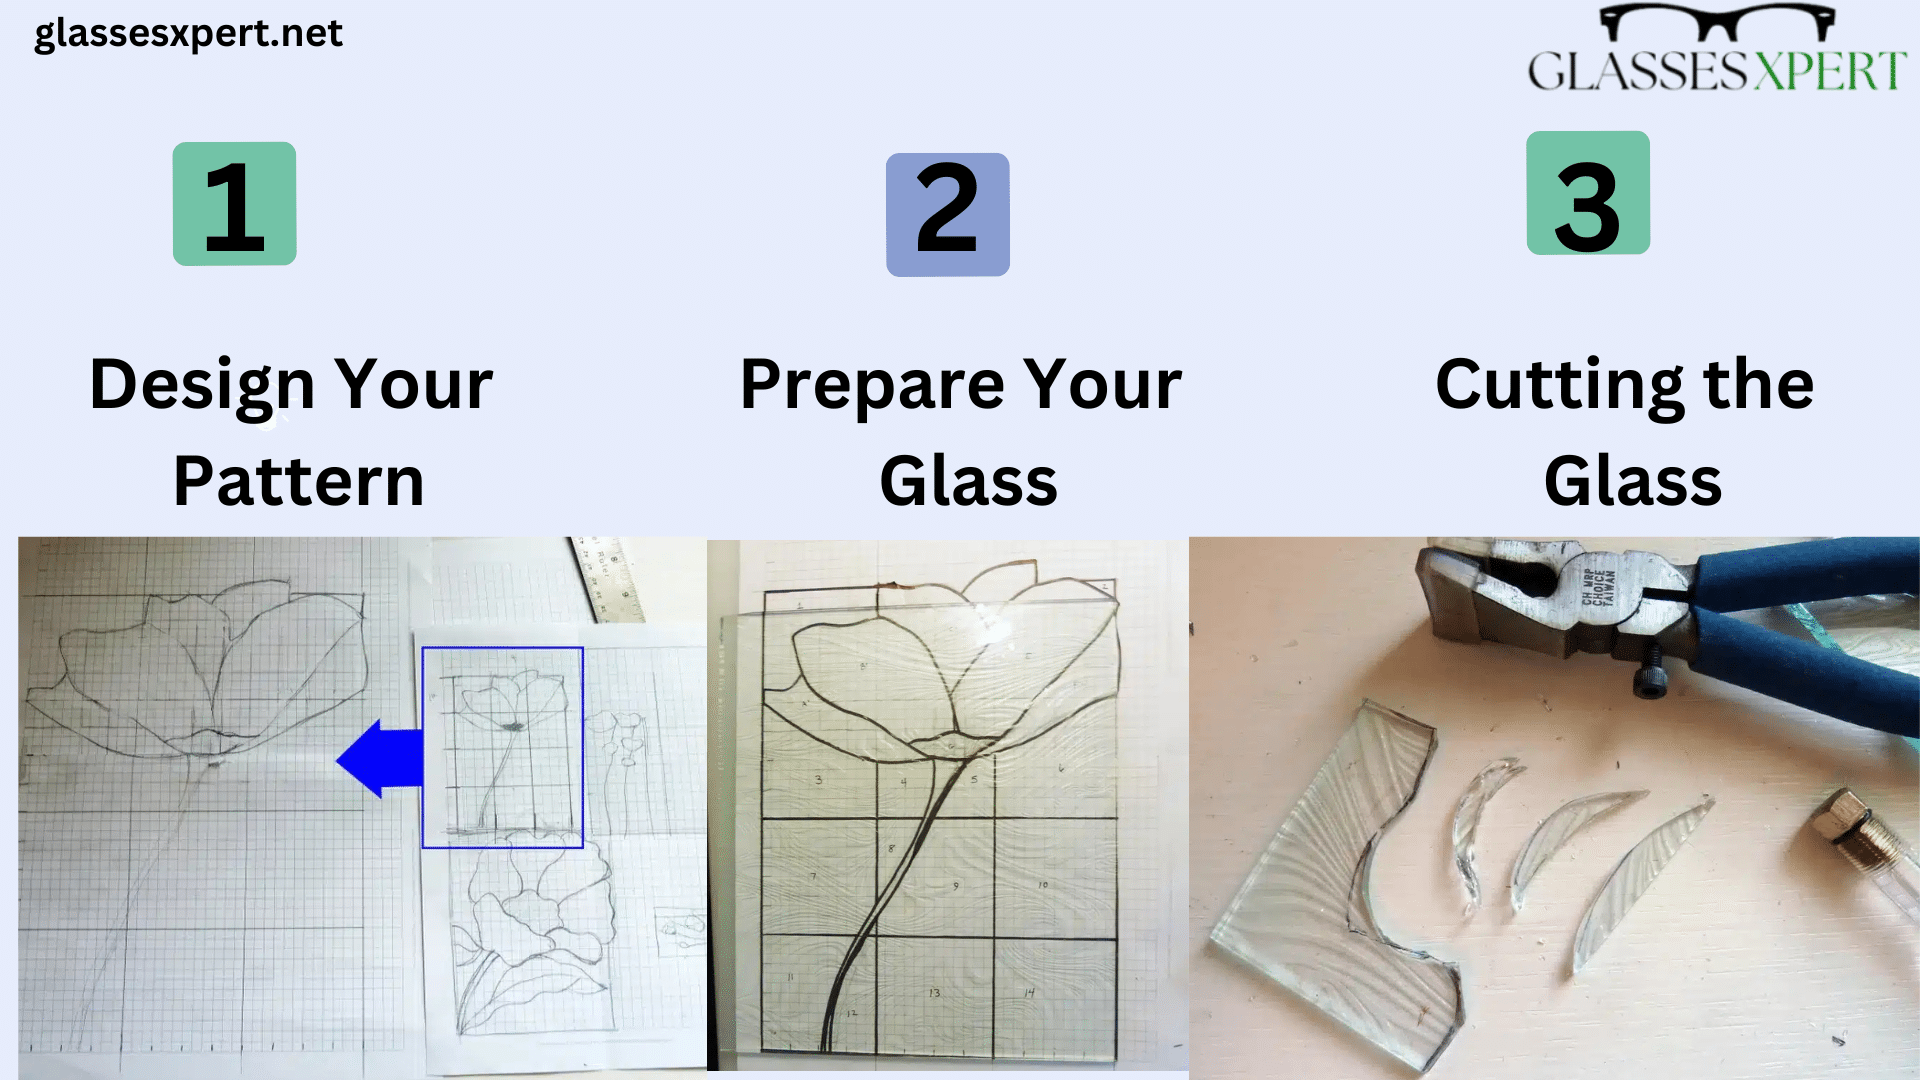
The first step in making stained glass is creating the pattern. The pattern can be a unique design of your own or a copy of a book or webpage. Make sure that the pattern you choose fits the dimensions of your piece of glass. More experienced painters can try more complex forms and curves, but beginners might wish to start with simpler patterns using straight lines.
- Select a pattern that attracts your eye. Beginners should start with simpler designs that require fewer elements.
- Trace the design onto paper using a marker. If you’re using a template, print it at the appropriate size.
Step 2
Select and Prepare Your Glass
Select the glass types and colors that will best accentuate your design. Look for glass that complements your design and enhances the overall aesthetic of your finished piece.
- Choose a variety of stained glass pieces that complement your design. Consider each piece’s transparency, texture, and color.
- To remove dust and fingerprints, wipe each piece of glass with a damp cloth. After cleaning, trace the pattern into the glass.
Step 3
Cutting the Glass
The key to cutting is precision and accuracy. Here is a step-by-step method of cutting the glass to make a stained glass project.
- Place your pattern on the glass and cut a score line through it using a glass cutter. To keep the score line clean, maintain a firm grip on the pistol grip and apply steady pressure. Always cut on the smooth side of the glass.
- Place the cutter where you want to start the cut on the glass. Pull the cutter along the score line with firm, steady pressure. The sound should be a consistent scratching noise.
- After scoring, use running pliers to apply gentle pressure along the score line. This helps with the clean breaking of glass along the cut. If any little bits are left, use bronzer pliers to nibble away at the edges.

Step 4
Shaping the Pieces
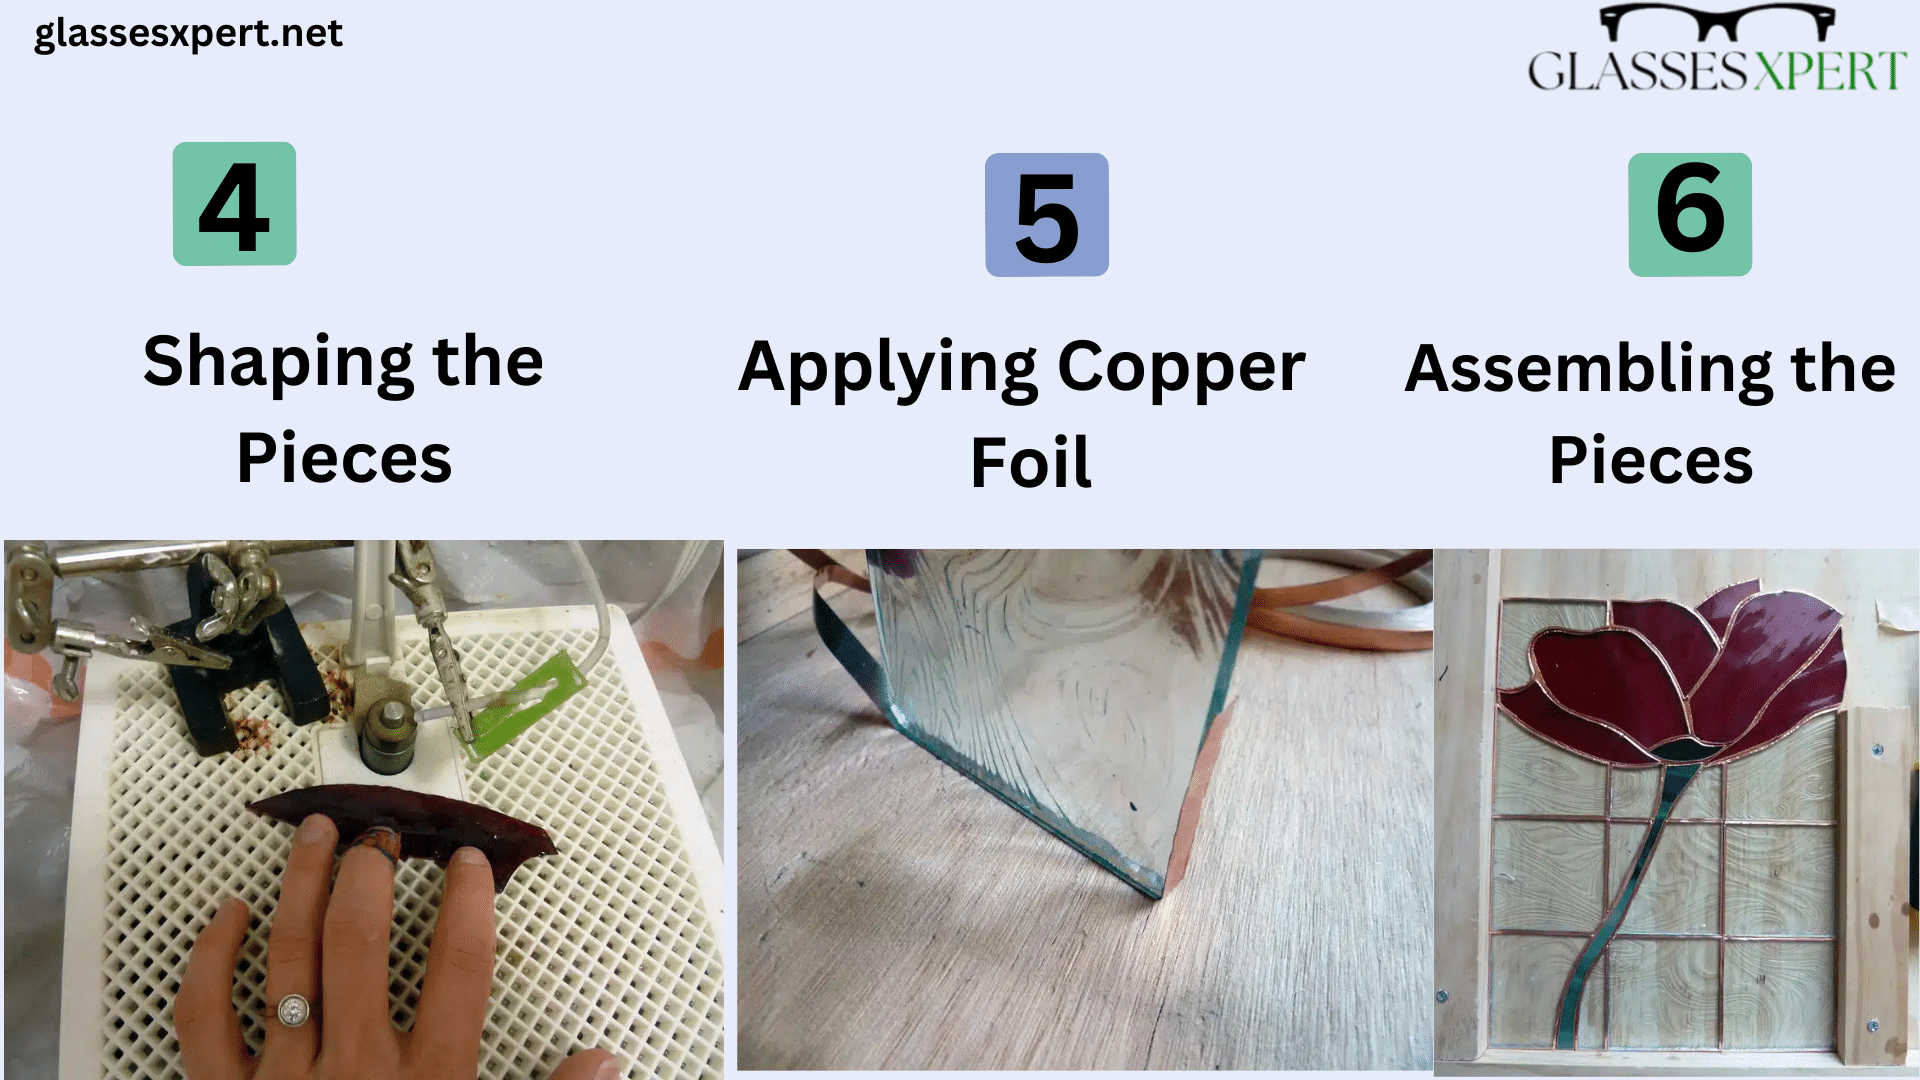
After cutting, glass pieces must be adjusted or fine-tuned. Use grocer pliers to smooth out rough edges and achieve precise shapes, ensuring all pieces fit together seamlessly.
Step 5
Applying Copper Foil
Apply copper foil around each glass piece. This step is essential for eventually connecting the components. To prepare the foil, cut strips of copper foil slightly longer than the edges of each piece of glass.
Center the foil on its edge and press down to ensure it adheres tightly. Fold the foil over to the front and rear surfaces to eliminate air bubbles and smooth it out with a fid or similar instrument.
Step 6
Assembling the Pieces
Using your design as a guide, arrange the copper-foiled pieces. Before going with the soldering, make sure everything fits precisely at this point. Temporarily secure the parts in place with tiny bits of masking tape.

Step 7
Soldering Stained Glass
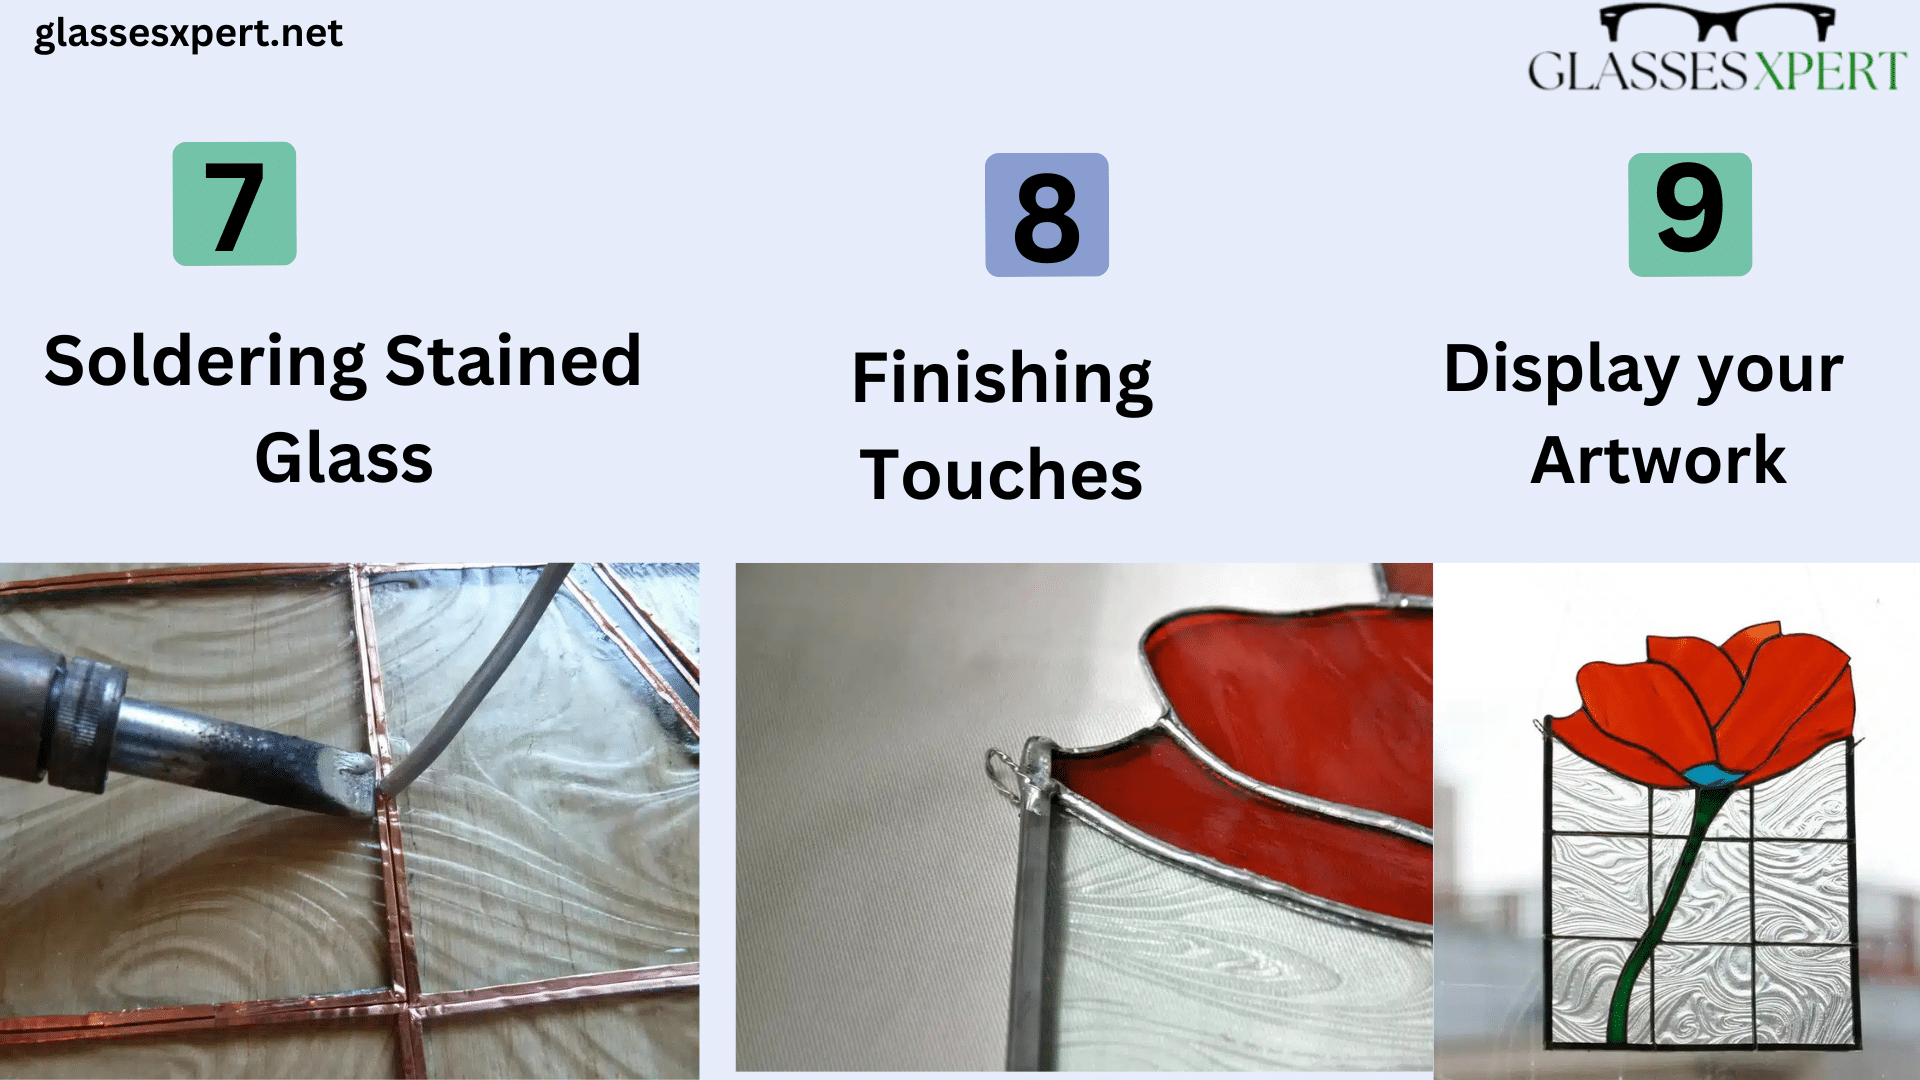
Soldering is the process of joining the copper-foiled pieces together using a soldering iron and lead-free solder. Heating up your soldering iron, tin the iron by adding a tiny layer of solder to the tip. This process, known as tinning, facilitates the smooth flow of solder. Explore the best soldering irons collection to make your glass work projects easy and convenient.
- After placing the solder on the glass, touch the foil with the soldering iron. When the solder melts, the glass pieces will fuse together strongly. Proceed slowly and deliberately for smooth and clear solder lines.
- Hold the iron in one hand and the solder in the other. As soon as the iron comes into contact with the copper foil, feed the solder onto it. To create a smooth bead, move the iron along the foil and let the solder melt and flow.
Step 8
Finishing Touches To Stained Glass Art
After soldering is finished, use a glass cleaner to clean your stained glass artwork to remove any residue. You can also paint the solder lines to give them a polished appearance.
- Use a soft cloth and glass cleaner to remove fingerprints and flux residue.
- If preferred, use a patina solution to alter the solder line color. Apply the solution using a brush, then remove any leftovers.
Step 9
Display your Stained Glass Artwork
Your finished piece is now ready to be displayed. Your stunning stained glass artwork will look great in any setting, whether you frame it or hang it to catch the light.
Tips for Success
- If you’re new to this technique, consider enrolling in a stained glass class. By taking lessons from a knowledgeable teacher, you become an expert in the methods and avoid typical blunders.
- Like any other craft, stained glass requires experience. Begin with simpler ideas and then elevate them to increasingly intricate pieces.
- Always wear safety glasses when cutting and soldering glass to protect your eyes from shards and fumes.
Making Faux-Stained Glass
Faux-stained glass is a great substitute for individuals who want to experiment with this art without requiring specialist instruments. This technique gives windows and other surfaces the appearance of stained glass using glass paint and liquid lead. It’s a fantastic way to express your creativity and give your house a splash of color. If you are not using glass, try making fake stained glass with clear plastic sheets and glass paints. This is an age-appropriate, safe strategy.
Materials Needed
Glass paint, liquid leading, and a clear glass surface (such as a window or picture frame glass).
Create a Design
Use the liquid leading to create your design on the glass surface. Give it time to dry completely. Fill in the spaces inside the leading with the glass paint. Let the paint completely dry.
Conclusion
Stained glass art is a rewarding and fun activity that yields stunning finished pieces of art and beauty. It transforms your ordinary glass pieces into the beautiful pieces that capture the true essence of creativity. By using the right materials and tools you can create your glass art pieces but the process of creation demands time, patience and practice. Enhance your skill level by practicing and enjoying the creation of unique and beautiful glass art pieces.


